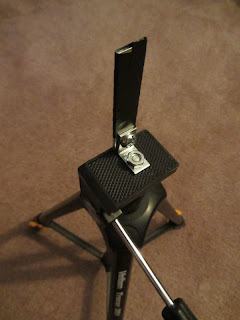
A tripod is also very useful for taking panoramas or time lapses (or even combining the two!).
This is my DIY solution. I think it has a number of advantages over other DIY designs, including:
- Inexpensive - it can be made for less than $10.00, even if you have to buy everything - but you shouldn't need to.
- Compact & portable - disassembles into a very small space (about 4"x1"x1") and is lightweight (this is important if you're backpacking to your photo-op!)
- Panorama-capable - can be made to position the lens directly over the tripod pivot - necessary for panorama photography
- Adjustable - will work with most feature-phones and smartphones.
Parts list:
- 3 3"x5/8" mending brace ($2.97 for a pack of 4)Note: Measure the width of your cellphone and make sure that the length of the brace is at least 1/2" longer. For larger phones, you may need to use a 4" or even 5" brace.
- 1 3/4"x1/2" corner brace ($1.97 for a pack of 4)
- 3 1/4-20 x 1/2" round head bolt & 4 1/4-20 nut ($1.18 for a pack of 5 bolts & 5 nuts)
- Electrical tape or heat-shrink tubing ($0.71)
- 1 or 2 Large rubber bands
Assembly:
 |
| Wrap one corner brace with electrical tape, covering all but about 1/2" of one end. |
Optional: Panorama mount
If you plan to use your phone to take panorama shots, you'll need to ensure that your camera's lens is directly above the tripod's screw (on the axis of rotation of the tripod mount). For this we need to add a couple of extra parts.
Panorama mount assembly:
 |
| In place of step 3 above, take a second mending brace and attach it to the other side of the corner brace, again ensuring that the bolt head is on the inside of the corner. |
 |
| Take a third corner brace and attach it to the second one. Use the third hole (counting from the corner brace side) on the second mending brace and the end hole on the third brace. |
 |
| Take one 1/4-20 nut and use it to attach the third corner brace to the tripod head, using the hole on the opposite end of the brace. |
Mounting your phone:
 |
| Put the rubber band over the upright, taped corner brace. Place the back of your phone against the back side of the brace and draw the band around the screen and looping it over the top of the taped corner brace. It should be a tight fit. If it's not, get a smaller rubber band (or loop the band over the bottom of the brace a few times to take up some of the slack). The photo above shows the completed simple mount on an Ikea Stam timer for doing timelapse panoramas. See this page to build one for yourself. |
 |
| If you're using the panorama mount, you'll need to adjust the angle between brace #2 & #3 (and possibly the angle of the corner brace relative to brace #2) to get the lens directly over the tripod screw. Make sure you re-tighten the screws once the alignment is correct. |
 |
| From the front, you can see how the phone's camera lens is positioned directly over the tripod's screw. This yields the best panoramas. |
 |
| Collapsed and ready for transport (LG Optimus S shown for size comparison) |
Update 10/01/12:
Here's an even simpler, lighter design. It's not as adjustable as the one above, but it should get you "close enough" for panorama shots. |
| Basically, you just eliminate the 3rd mending brace in the design above and rotate the angle bracket by 90°, then use the third hole out to mount it to the tripod. Rotate the angle bracket a bit more or less to center the lens over the pivot point of your tripod. |
The photo above shows the completed simple mount on an Ikea Ordning timer for doing timelapse panoramas. See this page for inspiration. To build it:
- Epoxy a 1/4-20 x 1/2" bolt onto center of the top of the timer.
- Epoxy a 1/4-20 nut to the center bottom of the bottom of the timer.
- Glue a piece of foam, rubber or other cushioning material onto the bottom of the timer. It should be about 1/8" thicker than the height of the nut, so that if you mount the timer on a flat surface, the nut doesn't hit.
- Screw a 1/4-20 nut onto the top bolt, then put on the mount and finally a 1/4-20 bolt (or wing nut, as shown above) and tighten until the unit is secure.
If your camera is heavy and you want to use a modified timer like the Ordning for timelapse panoramas, you might need to use a counterweight to level the top of the timer. You can use a third mending brace attached to the timer bolt, sticking out in the opposite direction. Attach a bolt with a nut or two on it as a counterweight (or tape coins, lead weights, etc.).


No comments:
Post a Comment